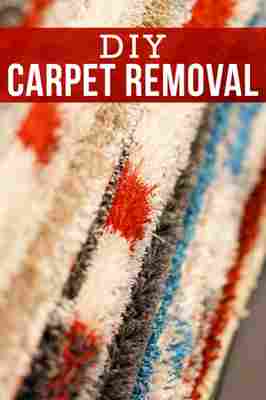
How to Remove Carpet From Start to Finish

Removing old carpet and getting new flooring can make a huge impact on your home during a remodel – but it can also make a big impact on your budget if you’re not doing it yourself. The cost of hiring someone to remove your carpet can easily range from $250 to $500 , and that’s just for your average-size living room. Some carpet installers will remove your old carpet for free, but more commonly, this service is charged for on top of the installation.
Learning how to remove carpet yourself is easier than you might think. With the right tools and some help, the whole project could be completed in a weekend by following five simple steps.
Essential Supplies & Tools for Removing Carpet
Before you start ripping up the carpet, make sure you have all the tools you need for removal. All of these supplies should cost less than $100, and you’ll save if you already have a hammer, pry bar and utility knife in your tool box.
“It may seem basic, but invest in the right tools for the job. Too often I try to complete a project without the best tool for the job, and it takes twice as long. Removing carpet is very budget-friendly, with only a few inexpensive, specialty tools required.”
Lora Green | Craftivity Designs
A Step-By-Step Guide to DIY Carpet Removal
1. Start Pulling Up Carpet From One Corner
The first step is to pick a corner of your room and start pulling up the carpet, making sure to avoid the prickly tack strips around the edges. A tack strip is a thin piece of wood, studded with nails or tacks, used in the installation of carpet. If the carpet won’t budge with sheer force, cut a small square out of the corner with your utility knife. Then, you can pull on the larger section and begin to rip up the carpet.
Removing Carpet From Hardwood Floors
As you pull up carpet from the first corner, you’ll quickly be able to see if hardwood floors lay underneath, which may influence your decision to get new flooring or simply refinish your existing hardwood .
If you are removing carpet to expose hardwood floors below, you’ll need to be extra careful during this first step. Since all carpet is held down with carpet strips, which are narrow wooden strips nailed to the floor, you should make your initial cut so it lines up with them. Typically, this would be about one inch from the wall. Then, use your pliers to grip the fibers and start pulling up the carpet you’ve cut.
Carpet Removal Tip: Most carpet doesn’t run underneath baseboards, but if you’re one of the unlucky few with carpet under your trim, you’ll have to remove them first. Learn how to remove baseboards without damaging your walls in the process.
2. Roll Up Your Carpet in Strips
Use a utility knife to slice the carpet into strips that are a manageable size to roll up and move. In an average-size living room, you should be able to work well with carpet that’s rolled into thirds.
Roll a third of your carpet back into the center of the room. Use your utility knife to cut along the fold, keeping both hands on the blade for safety. Roll up your cut section of carpet, and use duct tape to prevent it from unrolling. This will make it a lot easier to pick up and drop at the curb or in your dumpster, if you rented one for your project.
Carpet Removal Tip: If you’re clearing out a lot of carpet and other debris, renting a dumpster is a great way to get rid of it all at once. Usually, a 10 yard dumpster is best for a flooring removal project.
Continue rolling and cutting the rest of your carpet, making sure to cut off sections that are in a separate area, such as a closet or entryway. Come back to those after you’ve gotten the main portion rolled up and duct taped.
Removing Carpet From Stairs
Wondering how to remove carpet from your stairs? Start by cutting near the risers, the vertical pieces between one step and the next, at either one of the top corners. Since the carpet is held in place with carpet tacks and staples, particularly on the treads and risers, it’s important to wear gloves and collect loose staples as you go, so they don’t scatter everywhere.
If there is a metal nosing – the horizontal edge that sticks out on a stair – at the top of the stairs, pry it up and take it off. Otherwise, you can grab the cut corner and start pulling up the carpet, away from the stairs. As you work your way down the stairs, cut the carpet where necessary so you can remove several large strips of carpet at a time and roll them up into manageable sections. If your stairs have banisters, carefully cut around them in smaller pieces.
3. Rip Up Carpet Padding
There are two parts to DIY carpet removal – removing the carpet, and then tearing up the padding beneath it. Fortunately, most padding is stapled to the subfloor in patches, so you should be able to grab a seam and start ripping it up fairly easily.
Roll each section of padding up like you did while pulling up the carpet, duct taping each one to keep them from unfolding. Make sure you wear gloves during this process to avoid pricking a finger on the staples.
Carpet Removal Tip: If your padding is glued down, you’ll need a floor scraper to separate it from the subfloor. You can find these at any home improvement store.
4. Check and Prepare Your Subfloor
Once the padding is gone, you can inspect your subfloor. This is an important step if you plan on installing new hardwood floors or tile, since any issues with the subfloor will be much harder to fix once the new flooring is in.
These are the most important items to look for:
Wondering if it’s time to replace your subfloor ? Learn more about the signs of damage and costs to replace it before moving forward with your new flooring.
“Pulling carpet staples out of hardwood is one of the most tedious DIYs we’ve ever completed! After several hours of fighting staples, we started researching tools and found an affordable, effective solution for removing carpet staples from hardwood .”
Lora Green | Craftivity Designs
5. Remove Your Tack Strips (Optional)
If you’re installing new carpeting and your existing tack strips are in good condition, you can skip this step entirely. If not, you’ll need your pry bar and hammer.
To remove tack strips, find the nails holding them to the floor and slide your pry bar underneath. Use the hammer to force it deeper into the gap, and pull on the pry bar to loosen the strip until it’s free.
Out With the Old, In With the New (Flooring)
Now that you’ve successfully removed your old carpet, it’s time to get rid of all the debris and prepare for the next step of your remodel, whether it’s installing brand new floors or refinishing the beautiful hardwood that’s been hiding underneath.
Learn more about residential dumpster rental services to clean up after your carpet removal, and check out these other how-to guides to get started on the next phase of your new flooring journey: