Pioneer SMA3 review
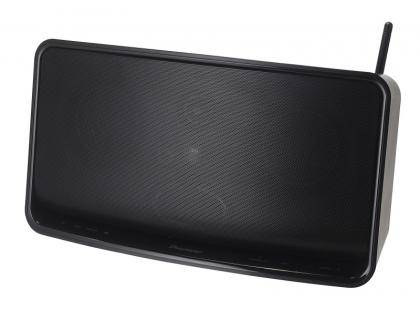
The Pioneer SMA3 portable speaker system plays audio from Airplay, HTC Connect and DLNA compatible devices wirelessly. You can also connect devices to the SMA3’s USB port or its 3.5mm input, and the USB port is incredibly handy for charging your tablet or smartphone. As if that wasn’t enough, the SMA3 has a Lithium-ion battery, which means you can take the SMA3 anywhere and stream music to it from the phone in your pocket or the tablet in your bag.
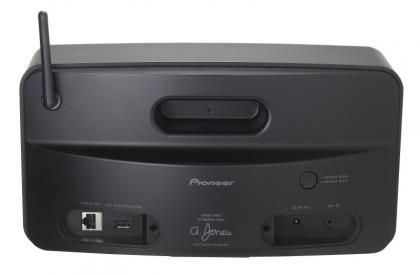
All the SMA3’s connection ports are located at the rear, behind removable rubber strips, and it has a Fast Ethernet port and 15V DC input in addition to its 3.5mm auxiliary input and USB port. This is a great selection inputs. Some may pine for a digital input, but this is very much intended to be a network audio player to be used anywhere with wireless devices than a static hi-fi. The ability to mask the inputs when you’re out and about is a neat design feature, but plugging the rubber strips back in to the SMA3 proved a more fiddly process than we’d prefer and we so typically didn’t bother.

The SMA3’s controls are all touch sensitive and are located at the bottom of its front panel along with four status LEDs, although the controls are limited to power, input and volume buttons. We normally prefer physical buttons, but the SMA3’s touch-sensitive buttons responded to our presses very quickly, greatly impressing us.
The SMA3 also comes with a remote control on which those buttons are replicated in addition to play and track selection buttons. It may seems strange that the remote control has transport buttons but not the SMA3 itself, but these controls are superfluous in the context of an Airplay-compatible system such as the SMA3 as you’ll be selecting music and pressing play using your mobile device or PC. The remote control’s handy, but the only truly useful controls on the remote control are the power and input buttons.

The SMA3 can either create its own network to which you can connect your phone or PC or you can connect it to your network wirelessly or via Ethernet. Unfortunately, this means there are a number of different start-up routines that you must commit to memory, unless you’re just using the SMA3 within your home. The start-up routines involve you pressing a series of buttons for a certain length of time in response to the status LEDs so that you can attach it to your network, copy network setting s from your iOS device or create its own network. We’d much prefer to use a display to connect it to a network, but a screen would ruin the clean design of the SMA3.
The quickest and most hassle-free way of connecting the SMA3 to a network is copying the network info from an iOS device connected to it via a USB cable.